Pressing 1
So what did we get done.
Over the break in a bit of a eureka moment I worked out how to machine the jigs as a single block. This means that it is much simpler to make them and therefore I’m planning 2 of each size. The jigs are now a 345x90mm block 100mm longer than the boards made up by laminating 90x45 pine studs. The block is mounted and machined to shape then faced with 4mm MDF to give a hard smooth surface.
Machining a new jig.
First off we machine the base and the core.
Then the base is fixed into the jig with double sided tape.
The edges are now fitted to the base using the slots at each end to fit the end of the edges into and 12mm brads along the edges to hold them in place in the jig. The edges are tacked every 200mm with super glue to make sure they don’t lift during the lay up.
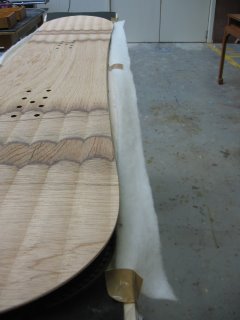
Setup ready to begin laying up. Note the breather cloth taped to the edge to help prevent the build up along the edges of extra resin.
Now it's on with the protective gear and begin mixing. The resin is mixed in 2 batches to help stop exothermic reaction occurring. Each batch is 420 grams. Down from 500 in the prototype and could be less still. Maybe as little as 360.
Each layer/surface to be joined is skimmed with resin and the cloth is wetted out fully. (Completely soaked through with the resin). The base and first layer of cloth is spread first then the extra edge tape is placed onto the jig and wetted out. We used the thicken resin to fill the voids in the edges.
The cloth is split around the locating inserts and rolled down to make sure there is good wetting between base and cloth.
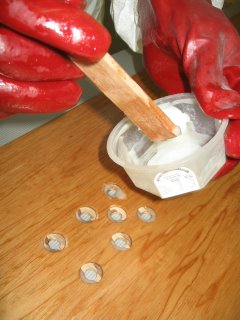
The core is spread with resin and the thickened resin used to locate the inserts in the core. Once in place the top of the cores is spread with resin ready to take the top glass cloth and the top sheet.
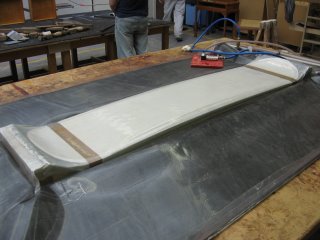
Once the position of the parts is OK each end is taped to stop it moving in the bag and the whole jig and lay up is put in the bag and vacuumed down.
Cleanup and wait until tomorrow for de-moulding.
Thanks for checking in. c.


0 Comments:
Post a Comment
<< Home